Showing posts with label Google Play. Show all posts

Saturday, March 22, 2014

Android Texture Optimization

tldr: We increased the terrain texture resolution for Android Big Mountain Snowboarding from 256 to 1024 by making some changes.

Colt McAnlis gave a talk at GDC on shrinking your png use in Android games that inspired me to go over some of our assets and code.  Our current setup is to use high res hardware compressed textures like pvr4 or dxt on platforms that have consistency, and use lower res uncompressed textures on platforms that do not.  For Big Mountain Snowboarding this means 2048x2048 textures on iOS and Windows are 256x256 on Android.  Sorry Android people!

Part of the size difference is because BMS is still supporting phones that no one uses.  When we originally released the game, phones didn't have enough texture memory to support the larger uncompressed textures.  This appears to not be the case anymore since we have released 4 newer maps with higher res textures without hearing many complaints.

However, file size of the apk prevents us from increasing the size of all maps.  We can't make all 16 maps be 1024x1024 without going over the 50 meg Google Play limit unless we make some changes to how we handle textures.

So at the start of this experiment, our assets folder is 32 megs, and the compressed apk is 33 megs.  We have some room to make the apk bigger, but not enough to increase the terrain resolution.  The first thing I tried was export for web from photoshop.
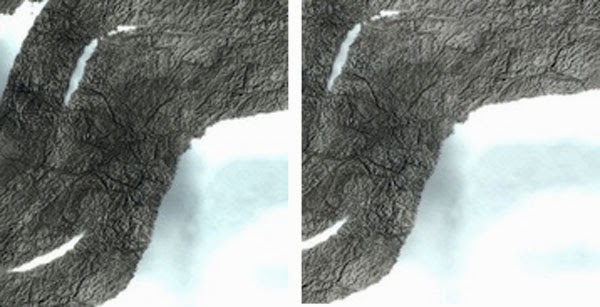
Export for Web:
8-bit pngs are not going to work.  These are very large pixels in world space due to the way we're handling terrain, so the banding is going to be very obvious.  It's hard to tell in that small image but it's there!  Using save for web with 24 bit pngs was not a big enough savings to worry about.

PNGCrush (lossless):
Using the option -reduce for lossless compression, the largest texture was reduced from 1469KB to 1344KB.  It's the right direction, but not really enough for me to increase the texture resolution.  Using -reduce -brute brought it to 1231KB.  I thought this might be enough to do a (time consuming) full run on all the larger terrain png files to see what it does to the apk, and 2 textures later decided to look for better options.

TinyPNG.com (lossy):
Tinypng.com is a site that provides free lossy compression of png files.  Here we are throwing away color information to favor a smaller disk size.  The site was able to reduce a 1.4 meg png down to 700k.
The difference is noticeable, which is unfortunate.  The unacceptable banding from the 8 bit version does not exist though!  Considering this amount of savings would let us increase the texture size of all maps I consider it worth it.  After a short meeting with our art director (me) and our tech director (me) where there was much arguing and throwing stuff, both departments agreed that it was a worthwhile change to make.

Doing this for all 4 of the large resolution maps brought our assets folder down to 21.9 megs (from 32), and our apk to 23 megs.

Parkinson's Law:
We now have approximately 27 megs to fill up!  Our older maps are using 256x256 textures on Android, and we have 12 of those.  A 1024x1024 mountain takes up about 2 megs of space, so it looks like we have room to bring all the old maps up to 2013.  Our pipeline lets us generate as much detail as we like but I can save time by starting with the OSX versions which are 2048x2048 and shrink them down.  With increased texture sizes our assets folder is 75 megs.  After compression the assets folder is 49 megs, which pushes our apk over the 50 meg limit.  Dropping the resolution of the two biggest maps brings us to 45 megs, but they are still higher resolution than the original game.

But what about the gpu?
None of this stuff matters on the gpu, where the textures will be uncompressed.  We've had some 1024x1024 maps on the market for a while without hearing about too many issues, so the phone quality of the average user has gone up a lot in 4 years.

I stuck in a breakpoint and all our png textures are loading as RGBA_8888.  Our big terrain textures would benefit a lot in memory size from being RGB_565.  The textures are 3 megs as uncompressed 32 bit and we have 4 of them per map.
     //bitmap = BitmapFactory.decodeStream(filestream);
     BitmapFactory.Options bmpOptions = new BitmapFactory.Options();
     bmpOptions.inPreferredConfig = Bitmap.Config.RGB_565;
     bitmap = BitmapFactory.decodeStream(filestream, null, bmpOptions);
 According to my breakpoints, this code loads in all non-alpha textures as 16 bit, which seems to look ok.  If it doesn't look ok for some specific textures we'll have to add a way to disable the code.


Friday, May 17, 2013

Google Play Game Services for Android setup tutorial


Gotchas:
  1. Your app must use Google APIs instead of Android SDK.
  2. You must use a signed release build for testing, with the same SHA entered into the google play console.
  3. You must import the google-play-services_lib project into eclipse.  Just grabbing the lib is not good enough.

Docs: 

Step 1: Get the google-play-services_lib
  • Use the Android SDK Manager to download "Google Play services".  
  • Right click in the Package Explorer window and select Import.
  • Under "Android" select "Existing Android Code Into Workspace". Click next.
  • Under "Root Directory" click browse and select [android-sdk-dir]/extras/google/google_play_services/libproject/google-play-services_lib.
  • Make sure "Copy projects into workspace" is selected.  You want a copy of the version downloaded from google.

Step 2: Link your project to the google-play-services_lib
  • Right click your project and select properties
  • Select "Android"
  • Make sure "Google APIs" is selected.
  • Under library click "Add" and select google-play-services_lib
  • Also set the lib project as a reference.  Right click your project, go to project references, and make sure google-play-services_lib is selected.  Otherwise it won't export with your retail build.

Step 3: Set up the google play console.
  • Go to play.google.com/apps/publish and sign in
  • Click the control pad icon to go to the new Google Play Game Services page.
  • Click "Add a new game" and fill out the details.
  • Select your new game, and click on "Linked apps".
  • Add a new android app and link to your store entry.
  • Click the "Authorize your app now" button after saving.
  • Enter your SHA1 signing certificate.  You won't be able to change this later.  To find your key, export a signed retail apk from eclipse and sign with the key that you use for publishing.  At the end of the process it will tell you the SHA1.
Step 4: Add yourself as a tester

  • Go to the google play games console for your app and click testing.
  • Add your google account as a tester.
If you skip this step you will see this in the logcat console:
Unable to retrieve 1P application 1234567890 from network
Unable to load metadata for game

Step 5: Set your app id in the manifest.
  • Grab your app's id from the google play console.  If you select the controller icon and then select your game you will see something at the top that looks like YourAppName - 1234567890
  • In your project in eclipse open res/values/strings.xml.
  • Add: <string name="app_id">1234567890</string>
  • Open your manifest file, and add this inside your application node: <meta-data android:name="com.google.android.gms.games.APP_ID" android:value="@string/app_id" />

Step 6: At program launch, make sure the player has Google Play Services installed.
Call this function on launch, and then again in onResume.  The first time it will send the player to the store for the package.  When the player comes back in to your app we will grab ahold of it.

// determine if the user has google play services installed.
//  if not, try to install it.
// should be called in onResume so we know that it got installed.
   public void validateGooglePlayServices()
   {
        int checkGPServices = GooglePlayServicesUtil.isGooglePlayServicesAvailable(mActivity.getApplicationContext());
        if (checkGPServices != com.google.android.gms.common.ConnectionResult.SUCCESS)
        {
        mServicesAvailable = false;        Dialog gpsDialog = GooglePlayServicesUtil.getErrorDialog(checkGPServices, mActivity, 1);
        if (gpsDialog != null) {
        gpsDialog.show();
        }
        }
        else
        {
        mServicesAvailable = true;        }
   }

Step 7: Create your GamesClient
private GamesClient mGamesClient = null;
private String mScopes[];
public void initClient()
{
validateGooglePlayServices();
if (!mServicesAvailable) return;Vector scopesVector = new Vector();
        scopesVector.add(Scopes.GAMES);
        mScopes = new String[scopesVector.size()];
        scopesVector.copyInto(mScopes);
      
        GamesClient.Builder gcBuilder = new GamesClient.Builder(mActivity, this, this);
        gcBuilder.setGravityForPopups(Gravity.TOP | Gravity.CENTER_HORIZONTAL);
        gcBuilder.setScopes(mScopes);
        mGamesClient = gcBuilder.create();
}

Step 8: Following the official guide
The rest of the implementation is fairly straight forward. 

Step 9: Testing
  • Export a signed release build
  • Uninstall your app from your device
  • Install your new apk using [android-sdk-dir]/platform-tools/adb install yourgame.apk
  • Launch the game, and watch the log cat window in eclipse.